Qt Creator programming environment (V: 9 min)
This section briefly shows you the most essential phases to start working with Qt Creator programming environment. You will learn how to write and execute a simple program in the virtual desktop environment used on the course.
We assume that you have created a connection to the virtual desktop by following the guidance given in the previous section of the course material.
An alternative for working in the virtual desktop is to install Qt Creator on your own computer. Instructions can be found from the end part of this page. This is a considerable choice especially in remote mode, but note that in this case you should also install Git on your own computer. Tips for this can also be found from the end part of the page.
General issues on Qt Creator
The programs in Qt Creator are projects, and thus, they always include
a file with .pro suffix.
This file tells which source code files the program has.
It is also the file that you will open, when your aim is to open an existing
program in Qt.
(As simplest, a program has only one source code file, main.cpp,
besides the project file.)
When storing programs into version control and submitting them in Plussa,
make sure that there is also the .pro file along.
How to use Qt Creator on virtual desktop
Follow the steps below when you are starting to write a new program with Qt Creator. Note that steps 1 and 3 are initial ones that are needed to be done only once before writing the first program.
If you have earlier attended a course, where you have used Qt Creator, you would be better to remove the old settings. If there have been any maintaining actions on C++ or Qt Creator after your last use of them, it is possible that Qt Creator do not work.
So, if you are using Qt Creator from the remote desktop for the first time, this step does not concern you. You can move directly to step 2!
During this step, Qt Creator must not be running. Otherwise the old settings will stay.
Remove the old settings by removing all files in directory
~/.config/QtProject. Start file management by selectingAccessories -> Files: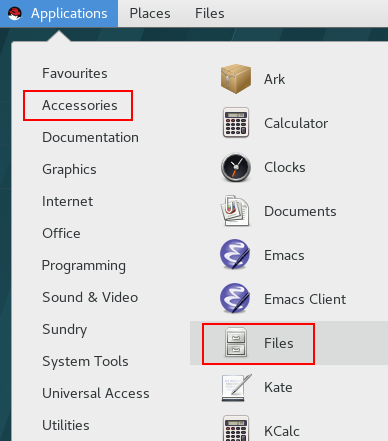
The opening window does not show system files starting with a dot. You can see them by adding a cross at “Show hidden files”:
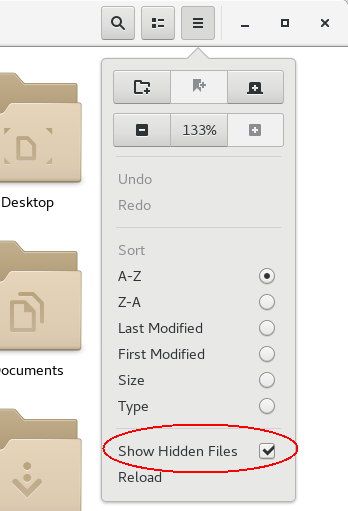
After that you can see the content of
.configdirectory and you can remove all the files insideQtProjectdirectory (which is inside the first-mentioned directory).Start Qt Creator tool from
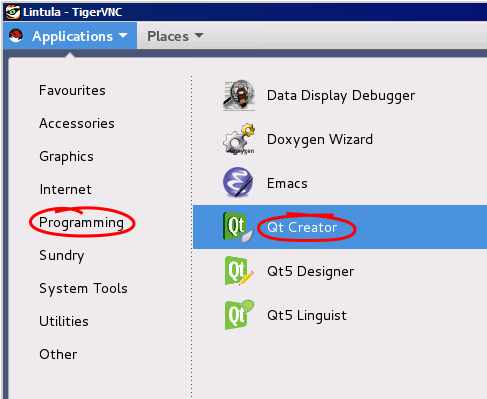
Applications > Programming >
Qt Creator
:
when you can see the starting window of Qt Creator:
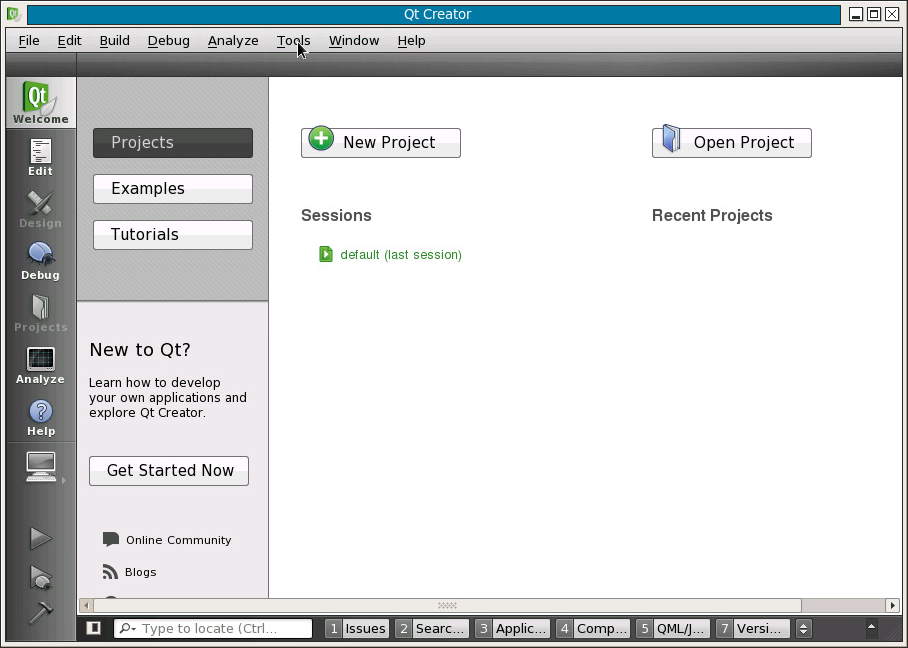
From the top bar menu, (depending on which one you can find) choose either
Tools -> OptionsEdit -> Preferences.
From there you can adjust the settings of Qt Creator. We may return to these setting later as the course advances, but already in this phase you can set the naming conventions of source code files.
From
{} C++, choose tabFile Naming. Check that file suffix for Headers ishhand that for Sources iscpp(orcc):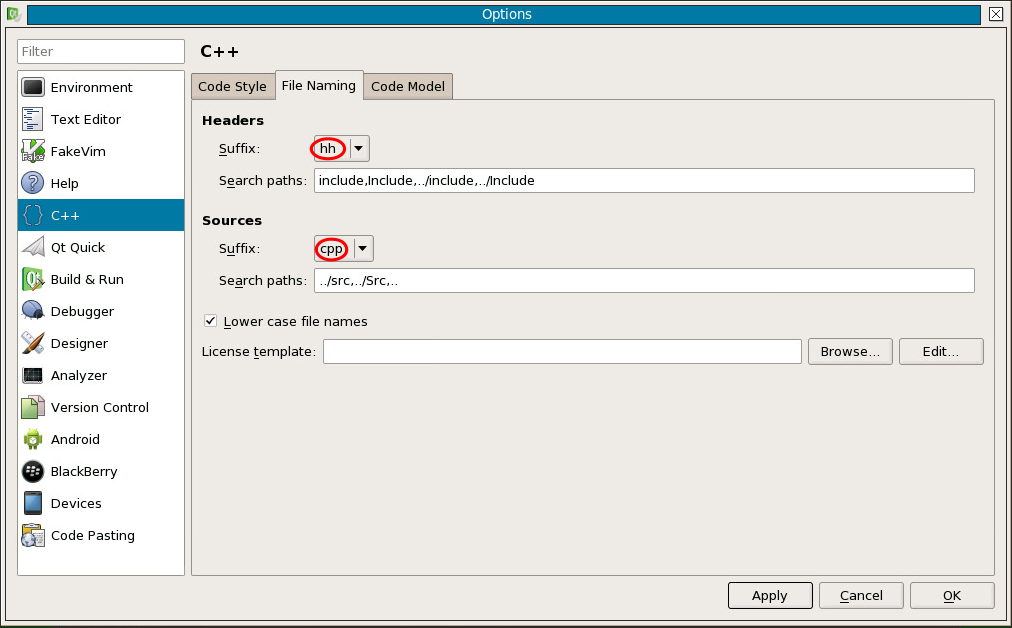
Choose
OKfrom bottom right, and you will return to the starting window of Qt Creator and everything should be ready for the first programming project.You can start a new programming project by clicking mouse at
New Projectin the starting window of Qt Creator. If you have already started to write a program and you are continuing it after a break, you can choose the desirable project underOpen ProjectorRecent Projectsdirectly with mouse. However, we assume here that you are starting a new project, and thus, you can chooseNew Project.After that you will see a couple of windows, where Qt Creator asks some details concerning the project before letting you to write program code.
The first thing to decide is the type of the project. In the beginning part of the course, all the programs are basic C++ programs without graphical interfaces or other specific features. Therefore, choose first the type of the project as
Non-Qt Projectand the subtype asPlain C++ Application: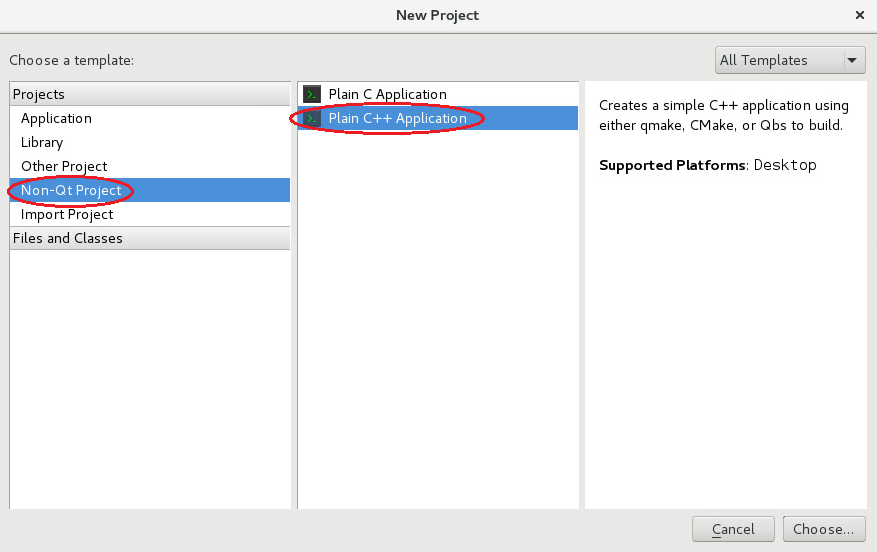
After that select
Choose...from the bottom right.Next selection concerns the directory, where Qt Creator will store all the files of the project.
At
Name:write a name describing you project as well as possible. For exampleweekly_exercise-01-task-03andproject_work-01are good names for the project.Next you need to decide the directory, where you store the project. For this first task you, you can make the decision by yourself. It can be a good idea to create a directory called
prog2for the course. This can be done in file system management of the virtual desktop or by clickingBrowseinProject Locationwindow and then, in the top right corner of the opening window, clickingCreate Folder, after navigating in the desirable directory.After the selections described above, Qt shows the name selections done:
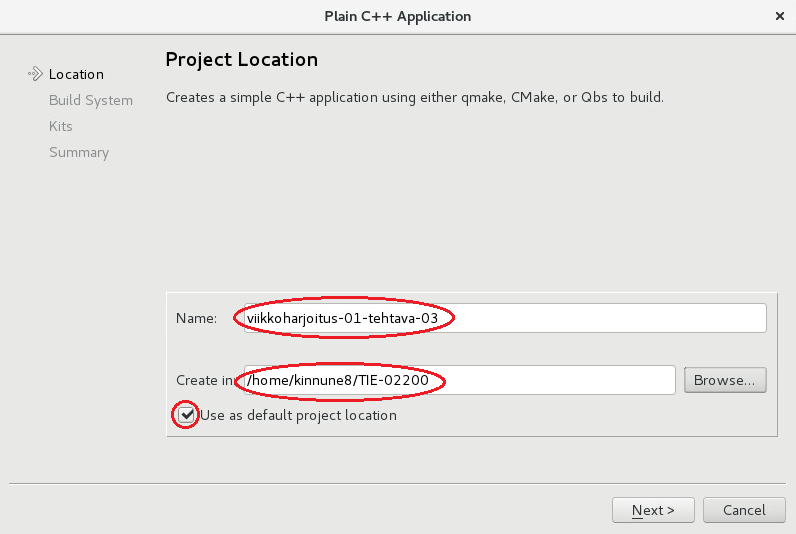
Choose now
Next>from bottom right.In window
Build Systemselectqmake. Everything in windowKitsshould be OK, and it is sufficient to selectNext>from bottom right.The last step before actual programming concerns
Project
Management
window. Here you can choose a version control system for your project. Although we will use Git version control on the course, we will not yet do so for this first project. Therefore, at this time choose<None>atAdd to version control. Finally, pressFinish.
Running a program in Qt
By default Qt may have such a setting on that a program prints its output in Application Out, and the program cannot read user input.
Therefore it is better to change options that in different environments/versions can be found from different places:
From the top menu, (depending on which one you can find) choose either
Tools -> OptionsorEdit -> Preferences.
After that you should find the point
Build & Run. FromGeneraltab, atDefault for "Running in terminal", chooseDeduced From Project.
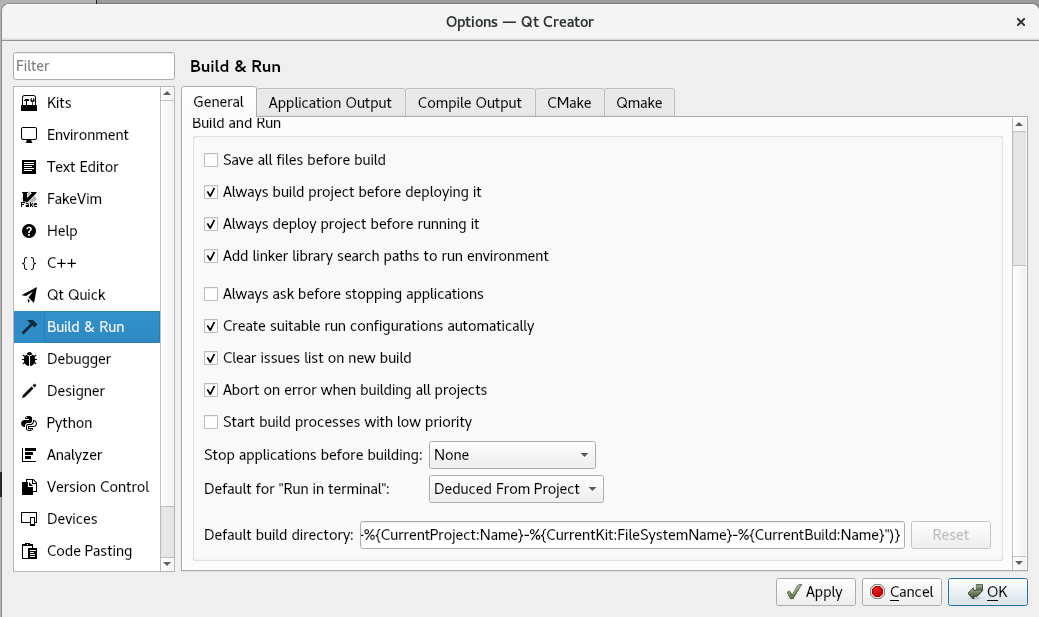
When now running a program, depending on your version or environment, there should appear a separate window, or you should see a Terminal part at the bottom of Qt window. Both of them enable you to run a program: you can see program output and give input.
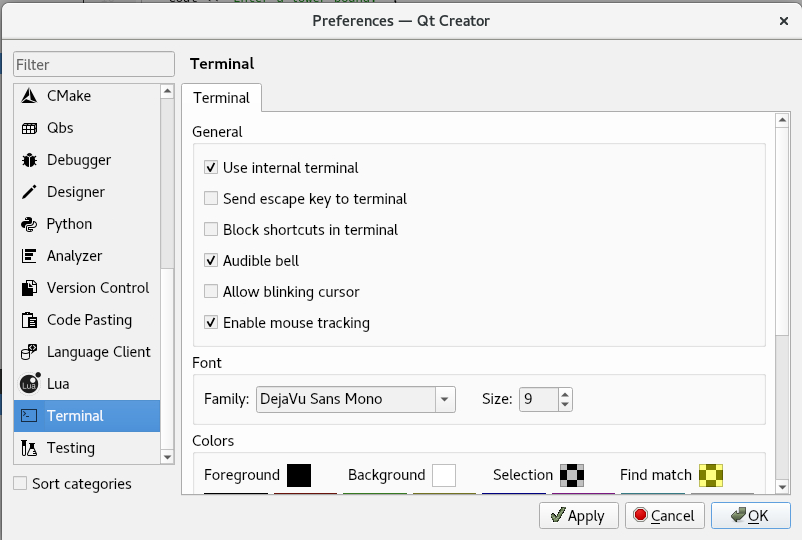
In addition, at least in remote desktop you choose the separate window for running programs:
Edit -> Preferences
where you should find Terminal.
You can either check or uncheck the point Use internal terminal,
depending on if you want to have a separate window or not
Video: Basic use of Qt Creator (9 min)
Video shows how to open and run an existing program and how to create a new program.
On installing Qt Creator to your own computer
It is possible to install Qt Creator to your computer, when you can write programs without internet connection. Installation process depends on the operating system of your computer.
If you are using Linux or Mac operating system, you must find out installation instructions by yourself. In both of these operating systems, you can check from Qt’s installing page if there is a suitable version for your operating system.
Mac users can find more information from here.
Caution
Note that probably this is not exactly the same version of Qt Creator and C++ compiler as has been installed in remote desktop. So, there can be differences.
Especially, it can happen so that a program works on your own computer, but it does not pass automated tests. In such cases, there is an error in your program, e.g. an uninitialized variable or over-indexing of a vector. (You can notice over-indexing by using at function instead of brackets.)
It is a good idea to test the assignments on the remote desktop before submitting them, since they will be tested in the same Linux environment by the course personnel. This is important, because it is possible that a program does not work in the same/correct way in different operating systems or in different versions of them.
Instructions to install Qt Creator in Windows
If you are installing Qt Creator in your own computer, especially in Windows you should install also Git Bash. This enables you to use command line in the same way as in Linux remote desktop. (Windows has a command line of its own, but it does not support Git commands, and thus, it is better to install Git Bash.)
The instructions below are valid for Windows (x86 Windows 11), but you can check from the link given in the first step, if you can start, even if you have another operating system.
To install Qt Creator to your own computer follow the steps below. To get Qt Creator to be installed, remember to check this choice.
Installation instructions:
Download the Qt online installer from this link.
Run the installer and create/log in to your Qt account.
Select Custom Installation.
Select any Qt version 6.8.3 or newer.
Under your selected Qt version, choose a MinGW version from the dropdown menu.
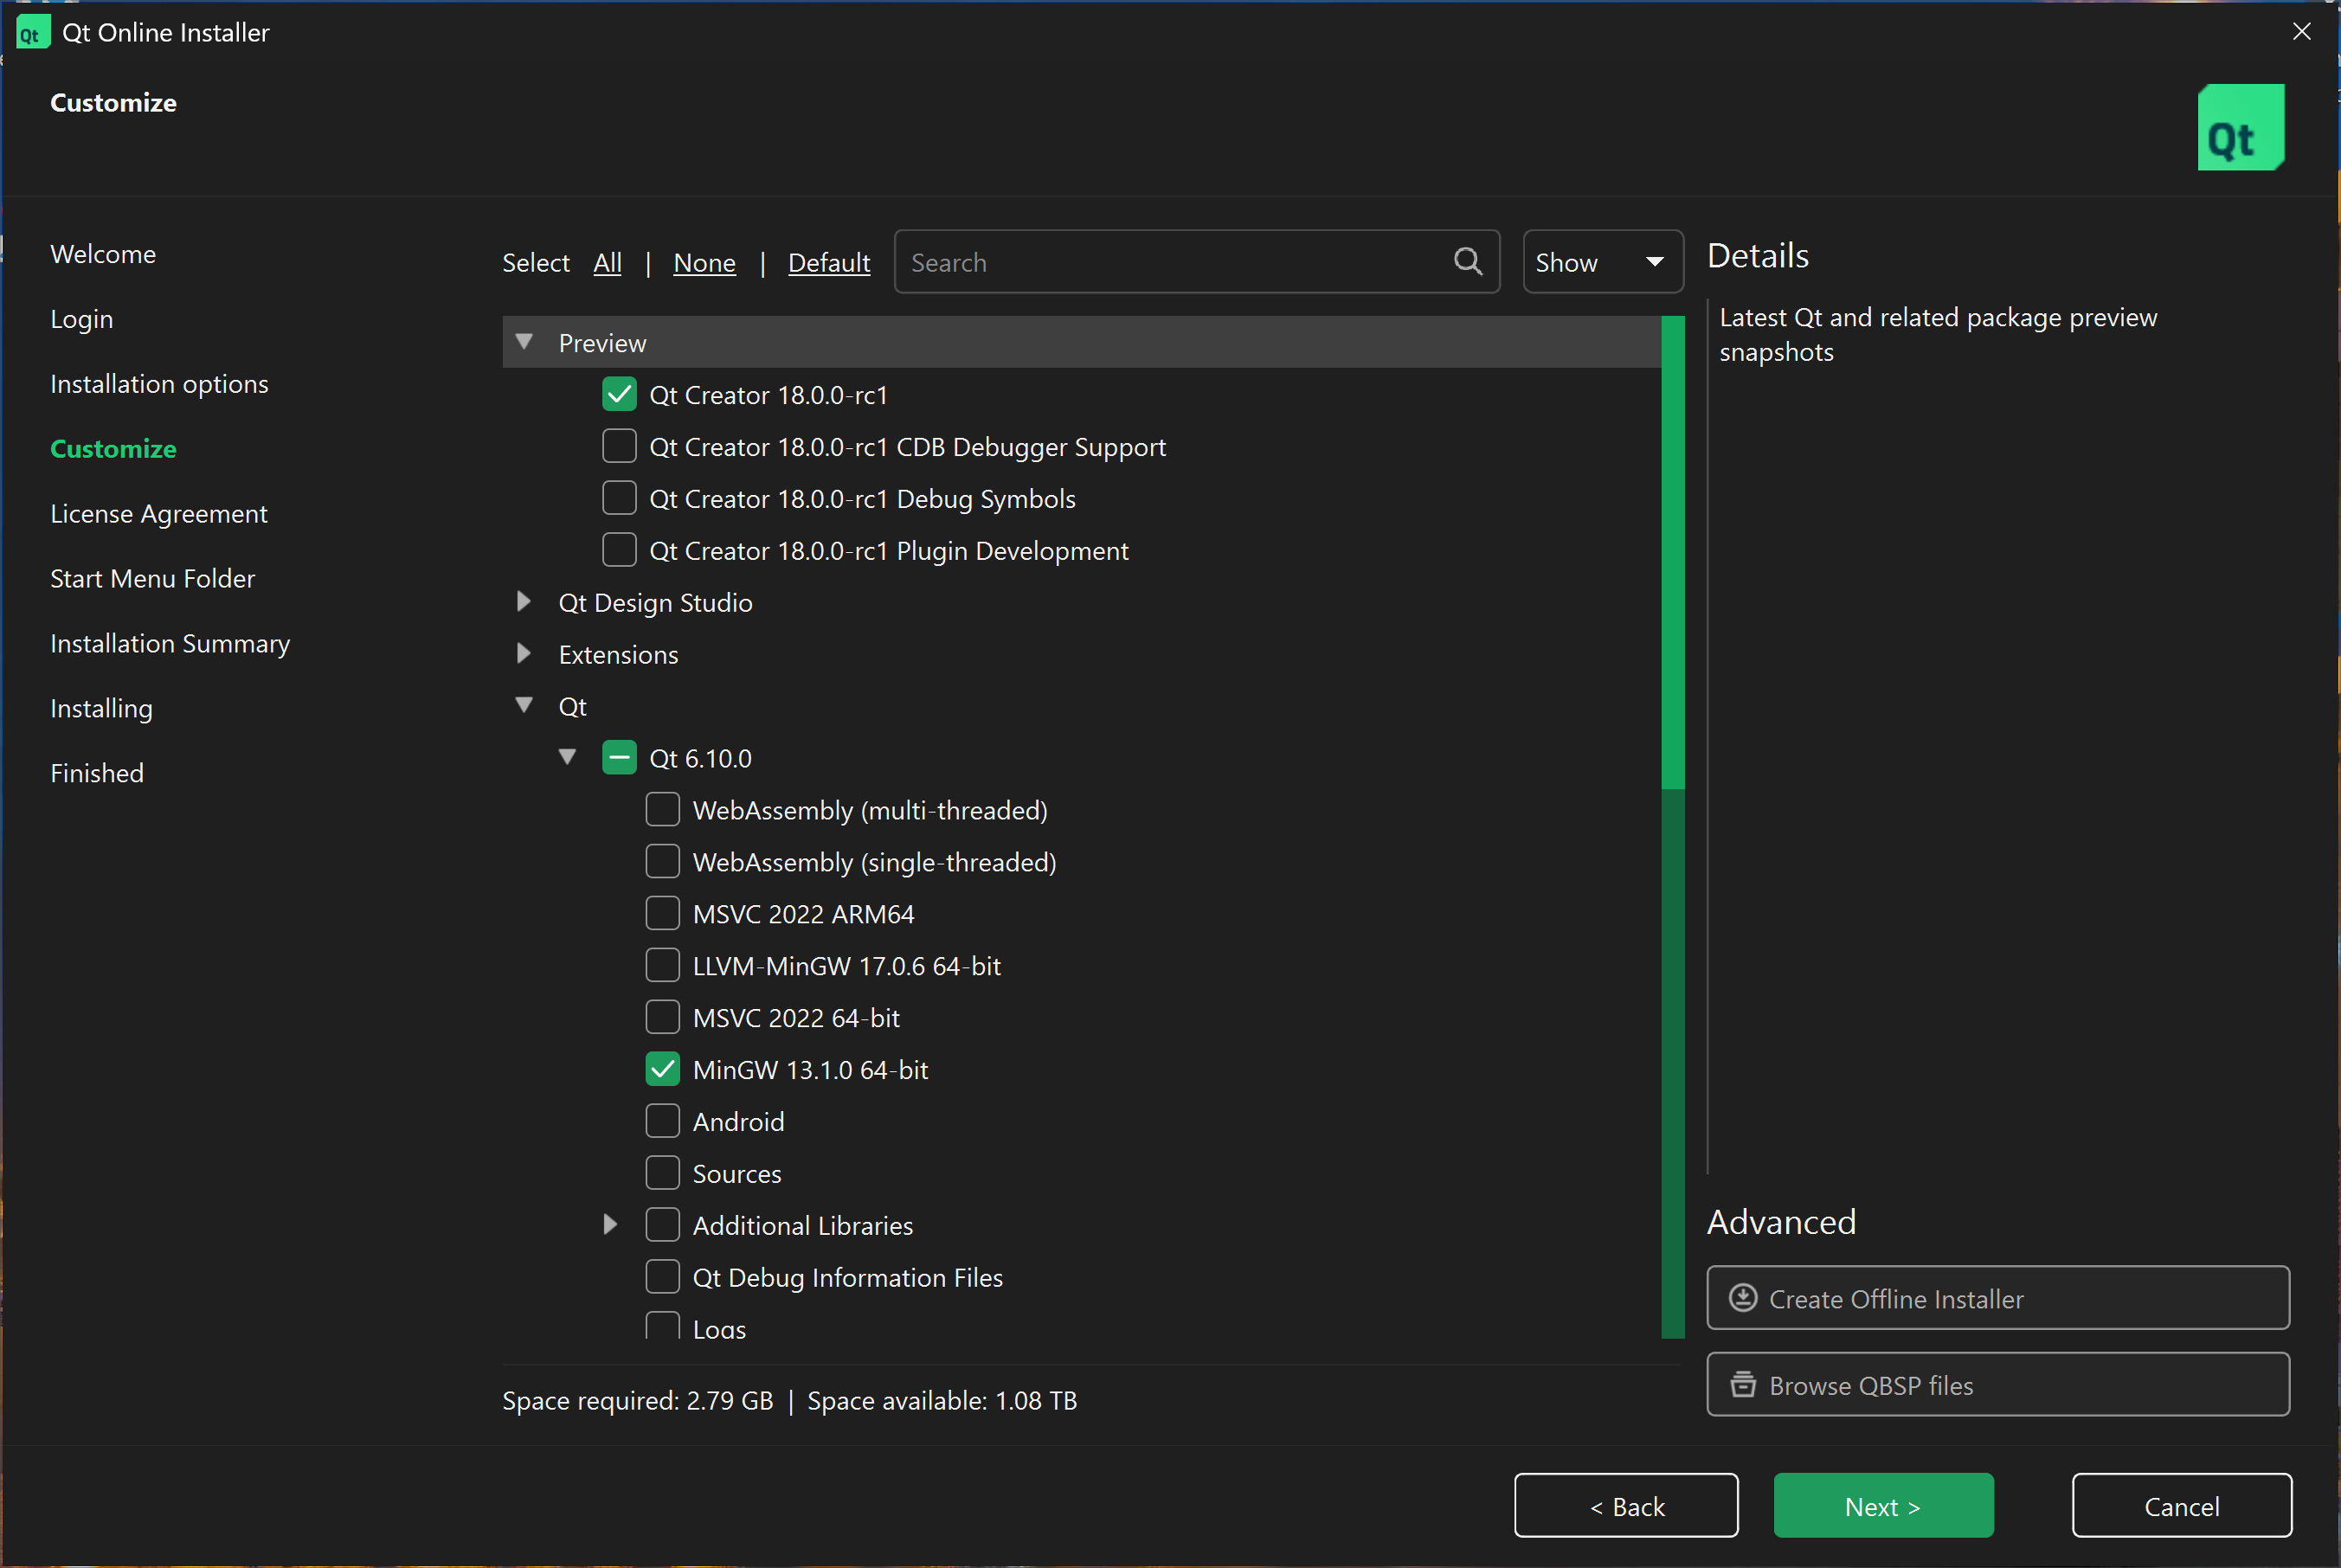
This is an example of possible selections in the component selection window. Do not panic if Qt Creator is not in the exact same location as shown in the picture, as the layout of this custom installation screen may change in future versions. A version of Qt Creator should be available somewhere in the selection. If there is no MinGW version available under your selected Qt version, search elsewhere in the component selection to find some version of MinGW.
Select Qt Creator (newest version available).
Accept license terms and complete the installation.
Launch Qt Creator to verify successful installation.